How To Install PHP 7 On Windows
It explains all the steps required to install PHP 7 on Windows from the official site and get started with PHP development.
This post explains all the steps required to install PHP 7 on Windows 10. The steps should be similar on the other versions of Windows. You can also install PHP 7 on Ubuntu by following How To Install PHP 7 On Ubuntu 18.04 LTS.
In some cases, we need to develop or test our application against a specific version of PHP or to install it separately. In such cases, we can download it from the official site instead of using a bundled package in the form of XAMPP or WAMP. Once installed, we can configure the latest PHP to work with the web servers including Apache and NGINX.
Notes: You may also be interested in our debugging tutorials to debug PHP. These include How To Install NetBeans on Windows, How To Install NetBeans On Ubuntu, How To Debug PHP In NetBeans On Windows, How To Debug PHP Web Apps In NetBeans On Windows, How To Remote Debug PHP Web Apps In NetBeans On Windows, How To Install Eclipse for PHP on Windows, and How To Debug PHP In Eclipse On Windows.
The upgraded version of this tutorial is available at - How To Install PHP 8 On Windows.
Step 1 - Download PHP 7 for Windows
Go to the official download link and download the required version of PHP 7 for Windows. The distributions are provided as tar and windows binaries. While writing this tutorial, PHP 7.3.1 is the most recent one, hence we will discuss the installation steps specific to PHP 7.3.1. Click the Windows Download Link and it will open the page having Binaries and Sources packaged for Windows.
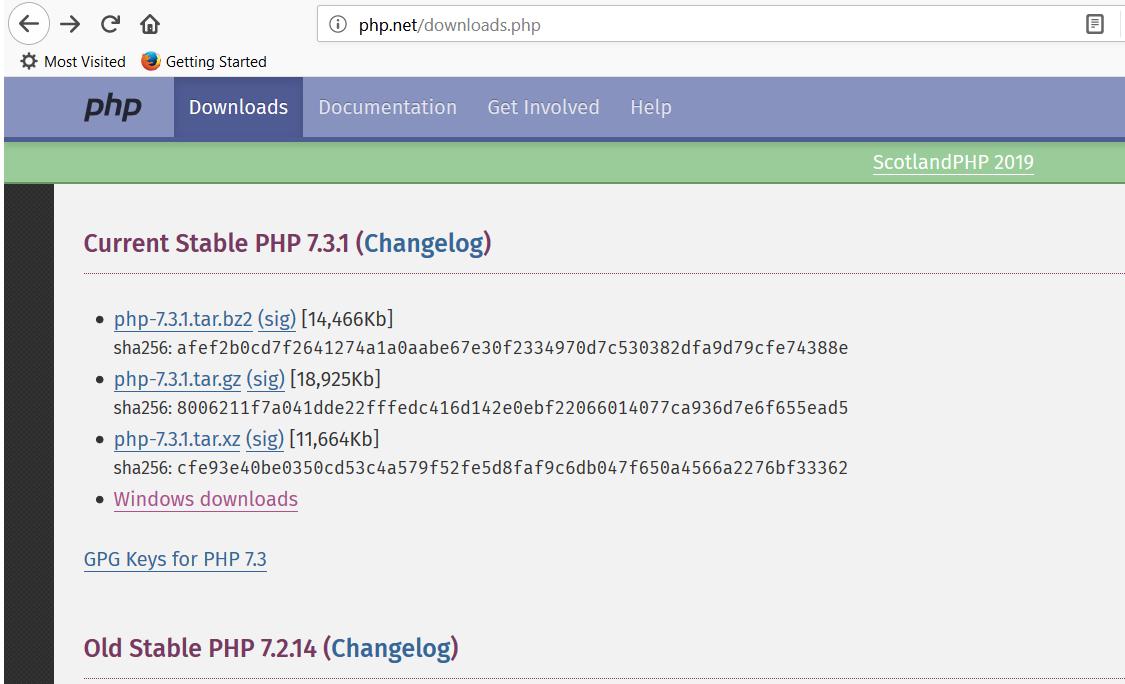
Fig 1 - PHP Download Site
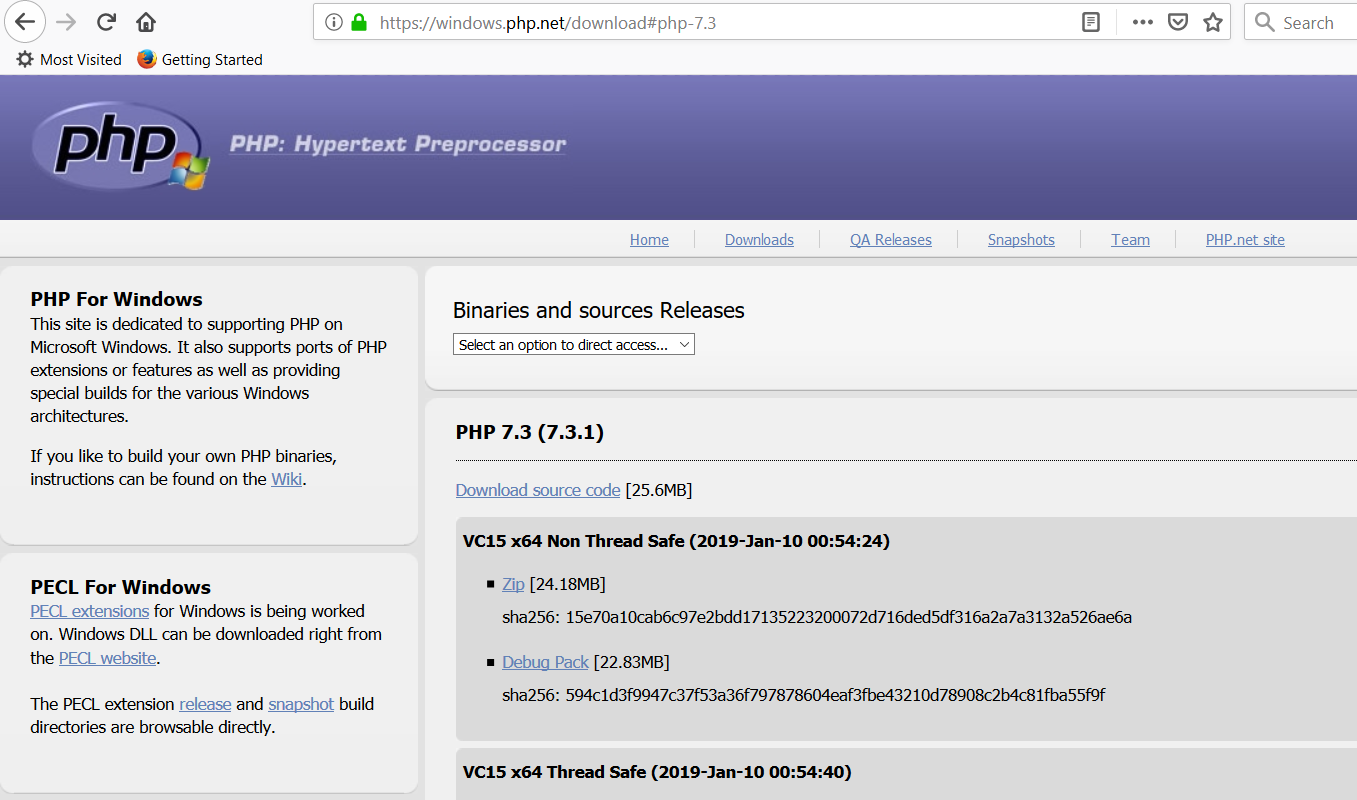
Fig 2 - PHP Download Site for Windows
We can see that PHP is available either as Thread Safe and Non Thread Safe. In simple terms, we can use Thread Safe PHP if we are using mod_php as worker MPM in Apache which spans multiple threads concurrently to process the requests and Non Thread Safe can be used for CGI. The Thread Safe version is required for web servers running in a multithreaded context.
The download page also provided binaries for both 32-bit and 64-bit Operating Systems. We will download the Zip Thread Safe version for 64-bit Operating System having the title as - VC15 x64 Thread Safe. As a regular user, we do not need the Debug Pack which is required for PHP developers.
Step 2 - Extract the Zip
Extract the downloaded zip at a specific location. It will look similar to the one having the PHP executable file as shown in Fig 3.
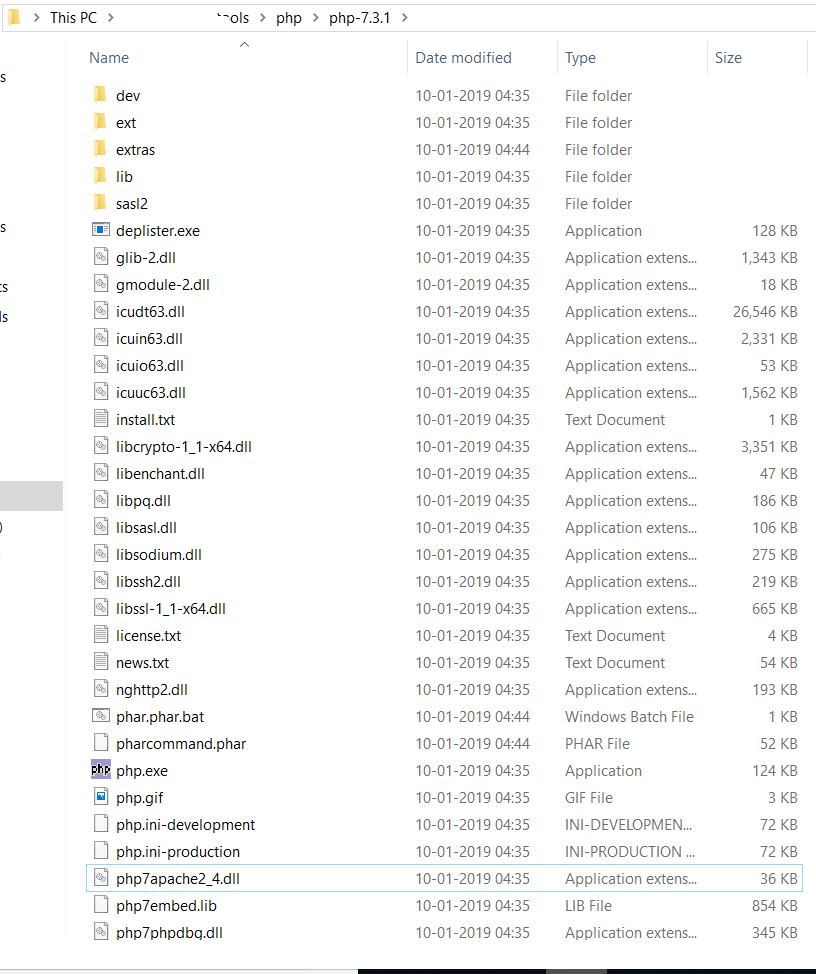
Fig 3
Step 3 - Verify Installation
Open the command prompt and type php --version to check the available version. It will look similar to Fig 4 in case no other PHP versions are available.
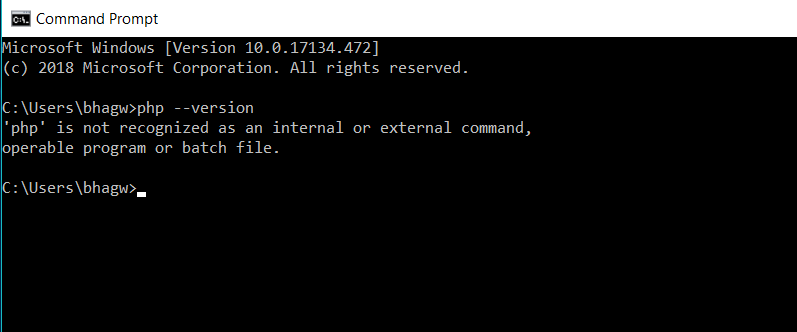
Fig 4
We need to configure the environment variable to access PHP from the command line. You can follow the below-mentioned steps to do so.
Right Click -> My Computer(This PC) -> Properties -> Advanced System Settings
The above steps will open the Windows settings panel as shown in Fig 5.
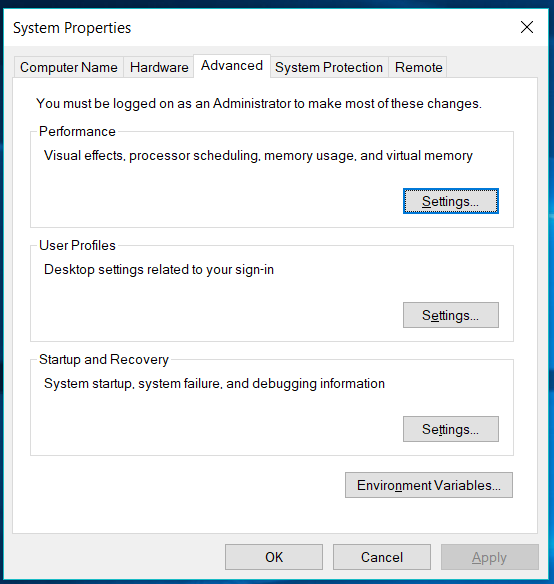
Fig 5
Now click the Environment Variables Button, select the Path under the User/System Variables section, and click the Edit Button. We need to add/update the path of the installed PHP to the system Path.
Click the New/Edit Button and add/update the path to the PHP bin which is E:\tools\php\php-7.3.1 in my case. Press the OK Button 3 times to close all the windows. This sets the PHP 7 on system environment variables to access the same from the console.
Now again open the console and test the PHP version as shown in Fig 6.
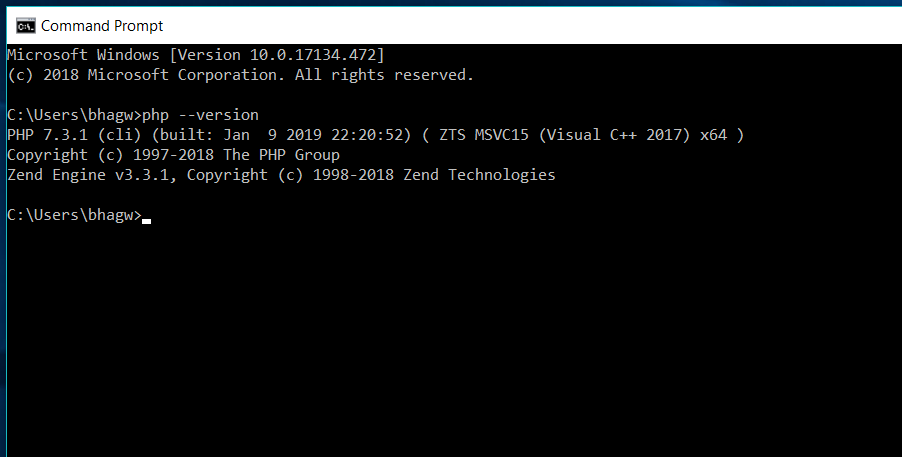
Fig 6
These are the basic steps required to install PHP 7 on Windows 10.
Step 4 - Getting Started With PHP Development
In this step, we will write a simple program and print Hello World on the console using the PHP executable configured by us in the previous step. Open your favorite editor and write the program as shown below.
<?php
// Print Hello World !!
echo "Hello World !!\n";
Now save the file as index.php and execute it using the command as shown below.
E:\programs\php>php index.php
Hello World !!
In this way, we can execute the PHP program on the console. Though PHP is meant for web development, we can also use it for console-based development. The latest PHP supports the modern programming concepts i.e. OOPS and it also supports strict typing.
Step 5 - Configure With Apache
You may have installed the Apache Web Server either independently or installed it as part of the bundled packages including WAMP, XAMPP, etc. In this step, we will simply configure the Apache Web Server to use the PHP installed by us in the previous steps.
Copy the file php.ini-development available at the path where we have extracted PHP and save it as php.ini at the same location.
Open the httpd.conf file of your Apache Web Server installation and search for the line having LoadModule php7_module. Now comment on the line and add the path to your PHP as shown below.
#LoadModule php7_module "${INSTALL_DIR}/bin/php/php7.1.26/php7apache2_4.dll"
LoadModule php7_module "e:/tools/php/php-7.3.1/php7apache2_4.dll"
PHPIniDir "e:/tools/php/php-7.3.1"
You might not find the php7_module in case the Apache HTTP Server is installed without using any bundled software. If Apache 2 is installed directly as shown in How To Install Apache 2 On Windows, you just need to add the module to httpd.conf as highlighted below.
....
....
#LoadModule watchdog_module modules/mod_watchdog.so
#LoadModule xml2enc_module modules/mod_xml2enc.so

LoadModule php7_module "e:/tools/php/php-7.3.1/php7apache2_4.dll"
AddType application/x-httpd-php .php
PHPIniDir "e:/tools/php/php-7.3.1"

<IfModule unixd_module>
#
# If you wish httpd to run as a different user or group, you must run
# httpd as root initially and it will switch.
....
....

....
....
#
# DirectoryIndex: sets the file that Apache will serve if a directory
# is requested.
#
<IfModule dir_module>
    DirectoryIndex index.php index.html
</IfModule>

....
....
Save the file and restart the webserver. Now create a file test.php at your webroot of the Apache server as shown below.
<?php
echo phpinfo();
Save the file, open your browser, and open the link - http://localhost/test.php. It should show the PHP settings as shown in Fig 7.
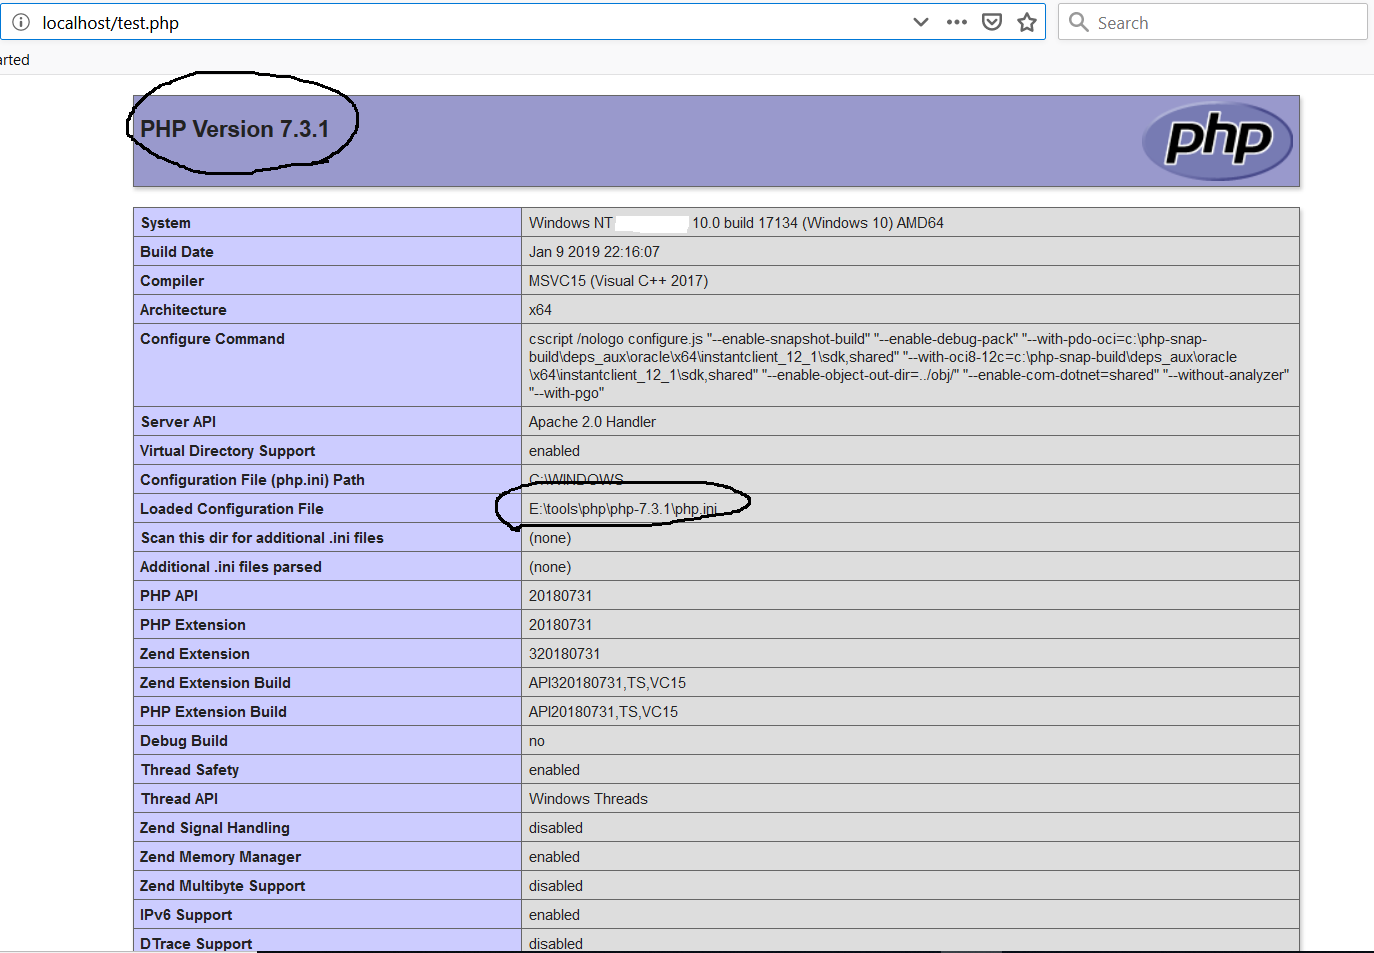
Fig 7
You can also enable the PHP extensions required for your project. The most important one is the pdo_mysql. I have updated the php.ini file and enabled it as shown below.
....
;extension=openssl
;extension=pdo_firebird
extension=pdo_mysql
;extension=pdo_oci
;extension=pdo_odbc
....
You must also enable to extensions directory by updating the php.ini file as shown below.
; Directory in which the loadable extensions (modules) reside.
; http://php.net/extension-dir
;extension_dir = "./"
; On windows:
;extension_dir = "ext"
extension_dir = "E:\tools\php\php-7.3.1\ext"
Below mentioned is the output of phpinfo() before and after enabling the PDO extension.

Fig 8

Fig 9
We have successfully configured the latest PHP installed by us to work with the Apache Web Server.
Step 6 - WampServer & XAMPP
The relevant tutorials to configure or install WampServer and XAMPP include How To Install WampServer on Windows, How To Install XAMPP On Windows, How To Update PHP Version In XAMPP On Windows.
Summary
In this tutorial, we have installed the latest PHP on Windows i.e. PHP 7.3 on Windows 10, and also configured the system path to use it from the console. We have also executed our first program in PHP to print Hello World on the console. In the last section, we have configured the PHP installation to work with the Apache Web Server and saw how to enable PHP extensions using the PDO extension example.


