How To Install NetBeans 11 for PHP on Ubuntu
It describes the steps required to install NetBeans 11 distributed by Apache Software Foundation for PHP development on Ubuntu. It also explains the steps required to create a PHP project and write a PHP program.
In this tutorial, we will discuss the steps required to install Incubating NetBeans 11 on Ubuntu for PHP development. The incubating versions of NetBeans i.e. 9, 10, and 11 do not come with an installer, hence we can either build it from the source or use the binary files provided by Apache. We will discuss the installation steps required to install it using the binary files distributed by Apache and write our first PHP program i.e. Hello World.
This tutorial assumes that appropriate Java and PHP are already installed on the system. You can follow the steps to install Java 10, Java 11, or OpenJDK 12 published by Tutorials24x7. You can also follow How To Install PHP 7 On Ubuntu 18.04 LTS to install PHP on Ubuntu. The steps to install NetBeans 10 and NetBeans 11 on other Linux systems should be similar to the steps mentioned in this tutorial.
You can also follow How To Install NetBeans 11 for PHP on Windows to install NetBeans 11 on Windows.
Download Binary Distribution
Click Here to visit the download page having appropriate download links and instructions to verify the download as shown in Fig 1.
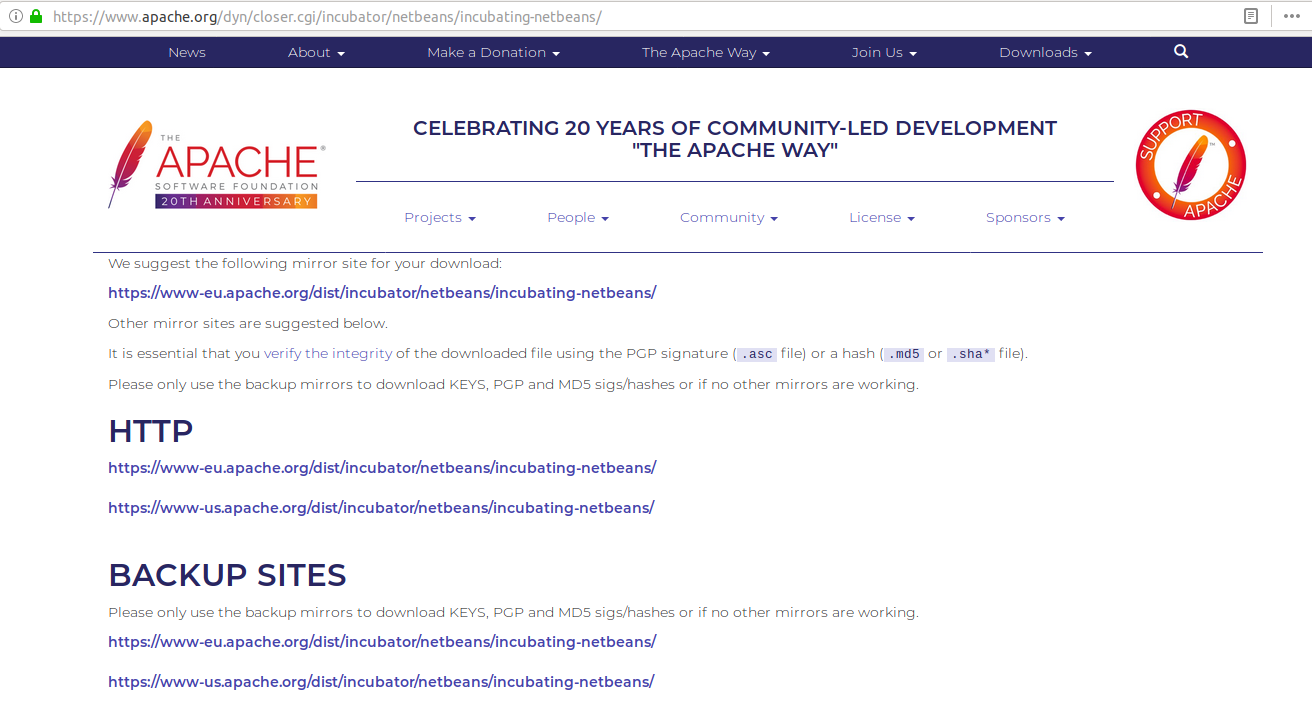
Fig 1
After selecting a particular mirror site, it shows the options available for download as shown in Fig 2.

Fig 2
Extract the Download
Now extract the downloaded zip and move it to the appropriate location. Also, locate the executable files in the bin directory as shown in Fig 2.
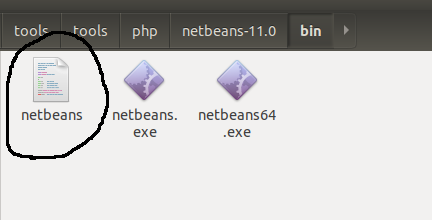
Fig 3
Make Shortcut
In this step, we will install the GNOME panel and use the same to create a desktop shortcut to execute the NetBeans installed by us in previous steps.
# Refresh packages index
sudo apt-get update

# Install GNOME Panel
sudo apt-get install --no-install-recommends gnome-panel

# Create Desktop icon
gnome-desktop-item-edit ~/Desktop/ --create-new
Now configure the NetBeans installation as shown in Fig 4. I have separately downloaded the new icon of NetBeans, released by Apache.
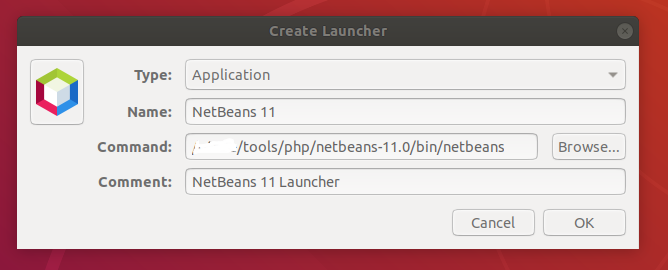
Fig 4
Press the OK Button to create the shortcut. The above-mentioned commands will create a desktop shortcut icon so that we can execute NetBeans without navigating to the installation directory. It might ask for security permission for the first time when you will execute NetBeans using the desktop launcher icon.
Execute the newly installed NetBeans using the desktop shortcut created by us. The welcome screen of NetBeans 11 is as shown in Fig 5.
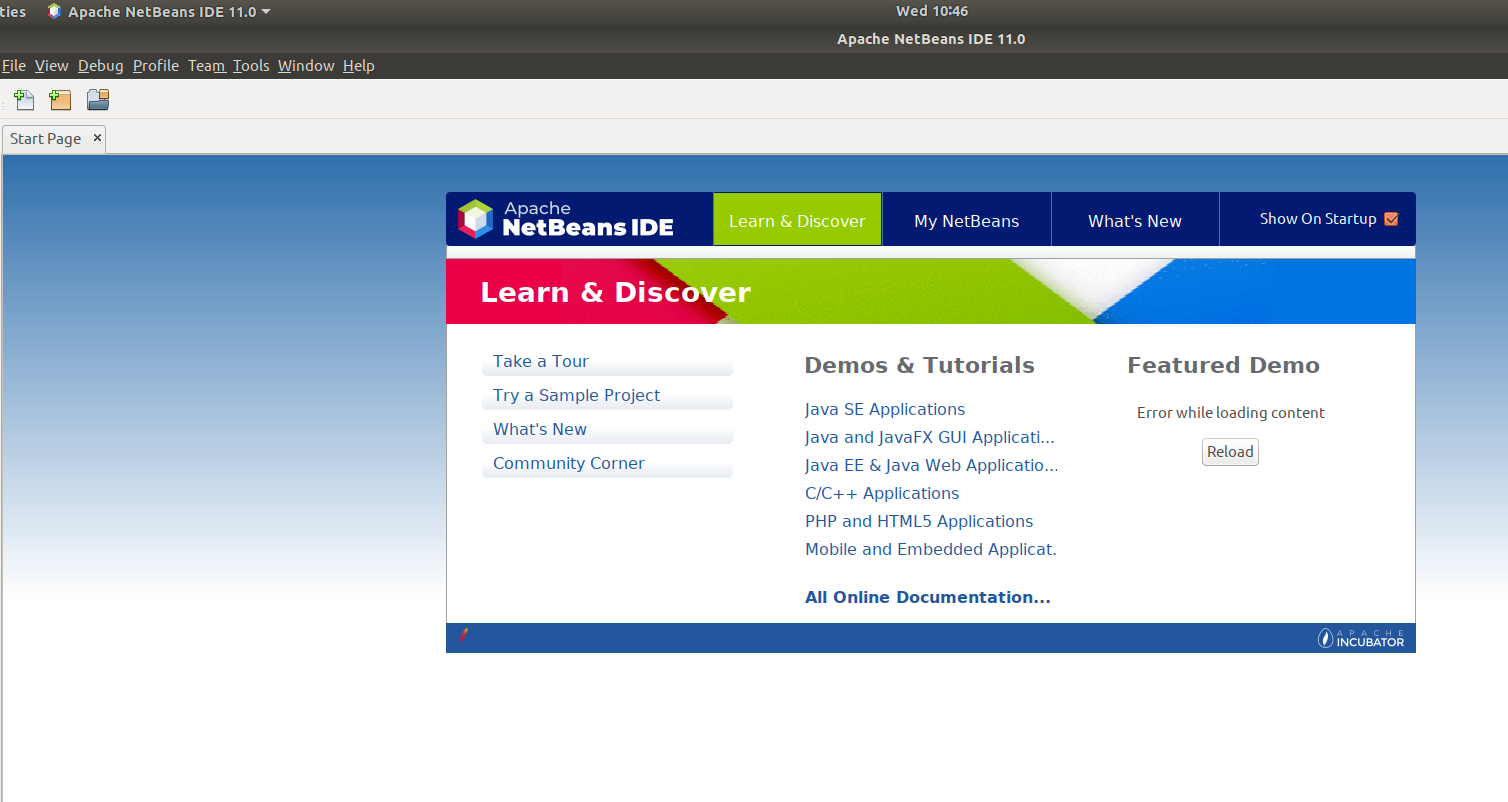
Fig 5
Create PHP Project
In this step, we will create our first PHP project using NetBeans 11.
Click on File Option on Main Menu and then click on New Project. It will open the New Project Wizard as shown in Fig 6.
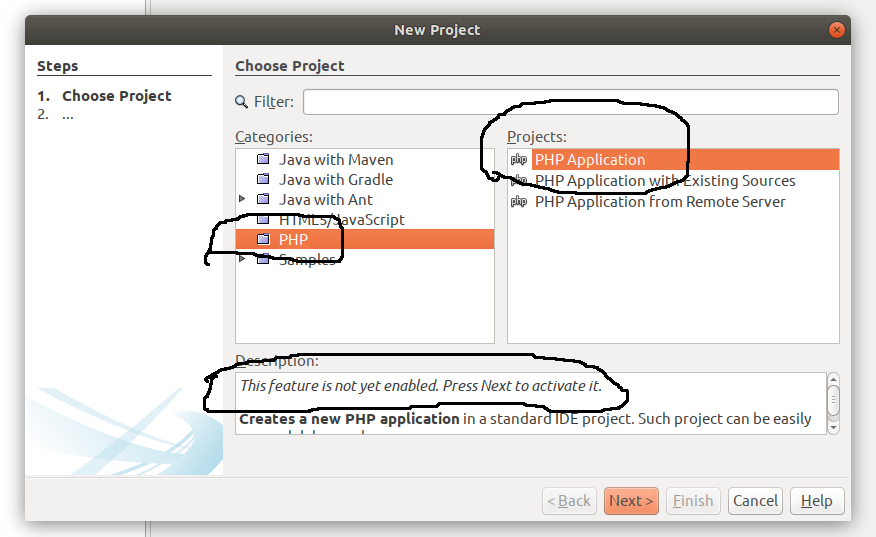
Fig 6
Select PHP from the Categories options and also select PHP Application from Projects options as shown in Fig 6. The NetBeans 11 will show a message in the description section to enable appropriate plugins required for PHP development, in case it's the first project. Now click the Next Button. On the next wizard, NetBeans will find the corresponding plugins required for PHP development and shows the options as shown in Fig 7.
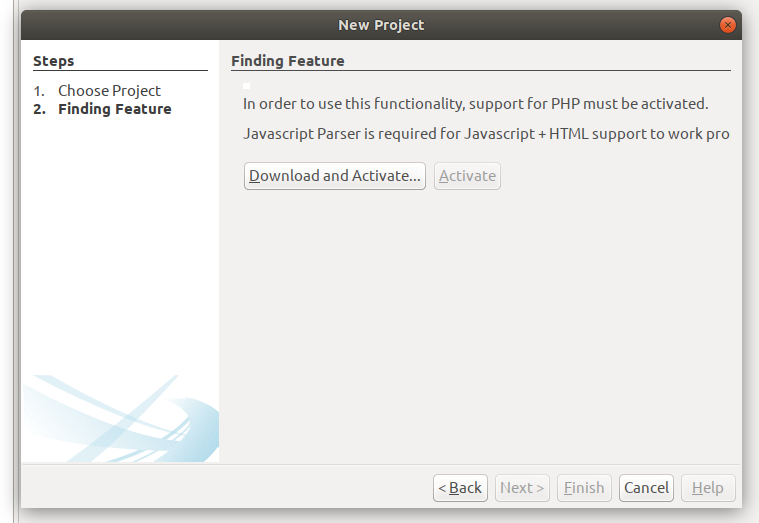
Fig 7
Click on the Download and Activate Button to download the NetBeans plugins including PHP, HTML, and JavaScript. The installer will also show a dialog to accept License Agreement for JS parser as shown in Fig 8.
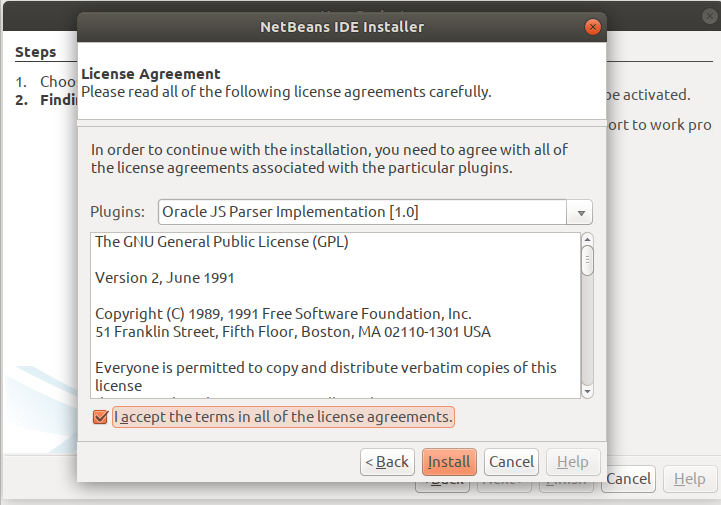
Fig 8
After installing all the required plugins, it will show the wizard to configure the project name and location as shown in Fig 9.
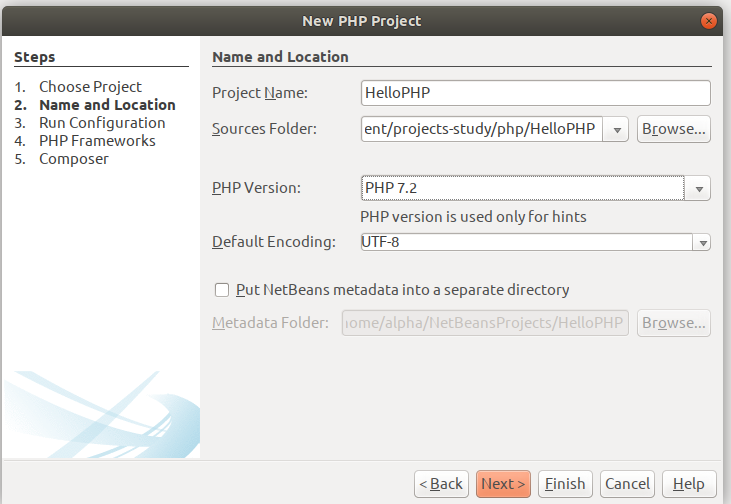
Fig 9
Fig 9
Provide the Project name and location based on your requirements and also select the PHP version. I have selected PHP 7.2 since it's distributed by default for Ubuntu 18.04. Now click on the Next Button. The next wizard provides options to choose the project's runtime configurations. I have selected Script for this tutorial as shown in Fig 9. It also asks for the corresponding PHP Interpreter to execute the program for the Script Option. The configuration in my case should be similar to the one as shown in Fig 10.
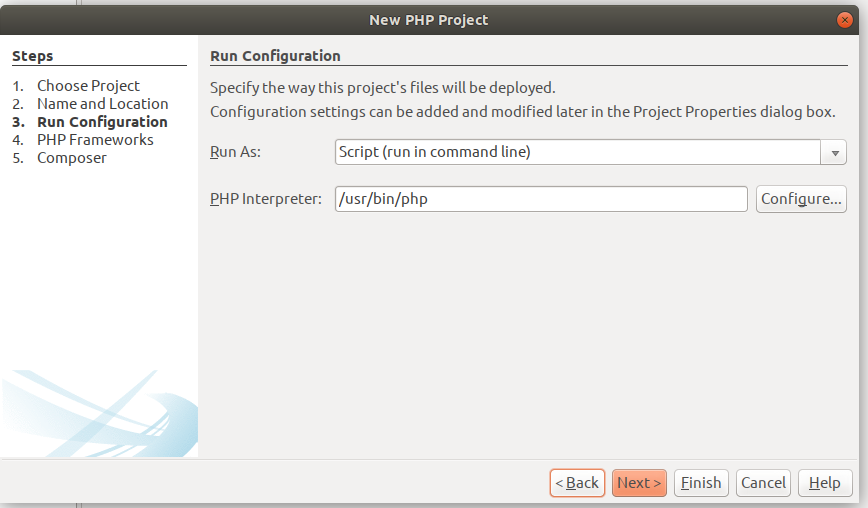
Fig 10
Apart from Script Option to run PHP program on the console, there are few more options specific to Runtime including Local Web Site, Remote Web Site, and PHP Built-in Web Server. This tutorial does not discuss the additional Runtime configuration. After selecting the Script as a Runtime option, we can also select the location where PHP is installed.
Click on Next Button. The next wizard will ask to select the PHP Framework as shown in Fig 11. We will simply skip this step since we will be writing a simple HelloPHP program in this tutorial.
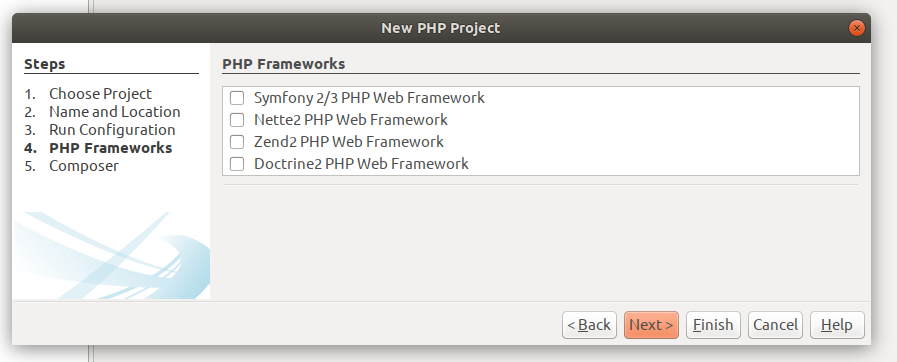
Fig 11
Click last time on Next Button. The next wizard shows options to configure the project for Composer as shown in Fig 12.
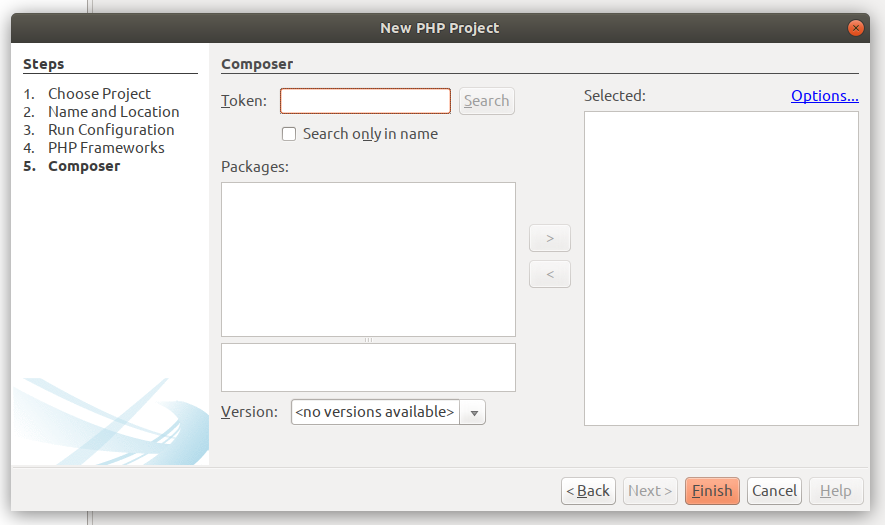
Fig 12
We will leave it blank and click on the Finish Button. The project with default index.php file created by NetBeans lokks like the one shown in Fig 13.
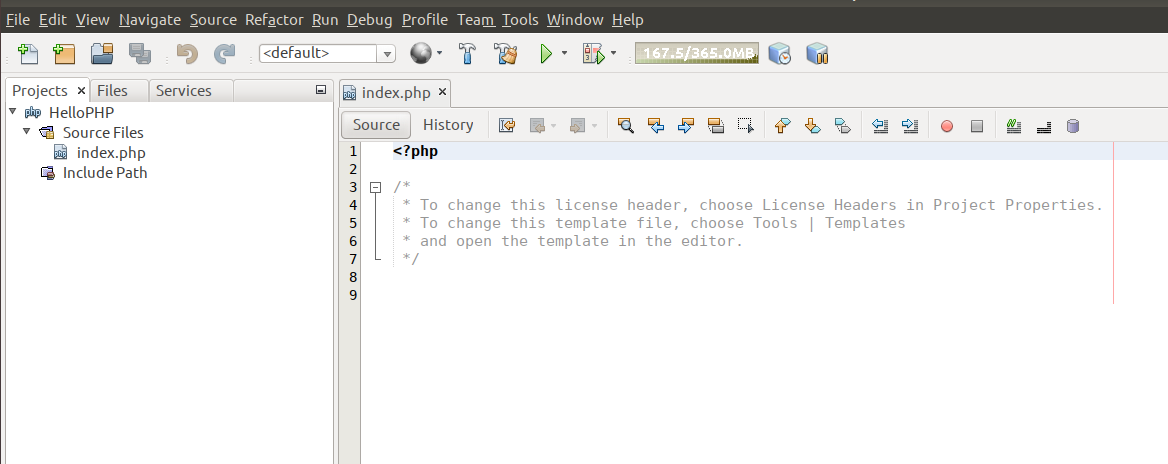
Fig 13
Hello PHP
In this step, we will update the index.php program and execute it on the console. Write Hello PHP as shown below.
<?php
echo "Hello PHP !!";
Right Click on the index.php file in the Projects Window on the left panel. Also, click on Run to execute the program. You can also select the File on Projects Window and press Shift + F6 to execute the program. It will show the output as shown in Fig 14.
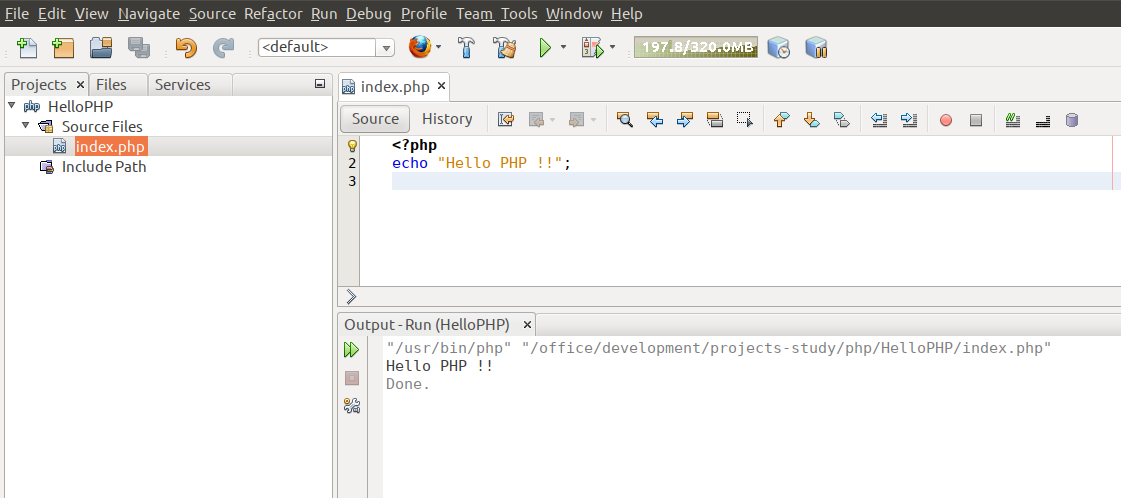
Fig 14
These are the basic steps required to install NetBeans 11 for PHP development on Ubuntu systems.


